Pages

September 26, 2013

{Oven} Bacon

OKAY, People we have a Pinterest WIN! I love trying out recipes, tips and all the tricks that people say are the best of the best. Glad I tried this trick for cooking bacon in the oven. It is definitely a life changer like it says to be. I followed the directions from a post off the blog Improv Kitchen. There are many of them to look at and pick from to follow directions. I would give this a try and see how you like it!

Oven Bacon 

What You Need:
12-16 slices of Bacon- As much as needed.
Baking Sheet(s) if more then one just make sure they will fit in oven side by side
Foil

Directions:
Line a baking sheet(s) with aluminum foil. Then place the cold bacon slices onto sheet(s) do not stack them and leave a bit of room between each slice. Place the baking sheet(s)  into a cold oven and turn on to 400ยบ F. Bake for about 18- 20 minutes flipping halfway through. Remove and place on a paper towel to drain grease then Enjoy! 

*Cooking Note:  Pay attention to bacon and if its looking too crispy just remove from oven. Different size bacon may take less or more time. Just keep and eye on them after turning at about 10 minutes.

September 25, 2013

Cinnamon Roll Waffles

I'm was never a sweets person or a breakfast eater until I seen a pin for Cinnamon Roll Waffles. These changed my life! I made these one day and I have never went back. I original posted this back in June 2013 but I deleted the post?! So I wanted to share again. I loved them and the picture I took  was one of the first for my blog. I hope you like this post and if you haven't tried this simple but huge craze. I say give it ago and try.

 
Cinnamon Roll Waffles
 
What Ya'll Need:
1 package of 5 or 8 count Cinnamon Roll Waffles
Syrup  
 
What to do:
Get a Waffle Iron,  place cinnamon rolls in close lid for 2 minutes remove and repeat. Once done put frosting on top and add the syrup of choice and enjoy!
 
Cooking Note: I have also used a homemade waffle mix and added cinnamon and brown sugar. Tasted just as great and used no frosting only syrup. So weather it's a can or mix it will work either way would work out great.


Roasted Salsa Verde Chicken

I have yet another crockpot recipe for y'all. I have been cooking a lot of recipes at home in my crock pot and was looking for a way to make chicken enchiladas with a salsa Verde.  I love Salsa Verde "green sauce" it can be used as a dip or in a favorite recipe and I have had my fair share of chicken enchiladas, using salsa Verde rather it was at a restaurant or at home. So I was on a mission to find the best Salsa Verde in a jar I could find. I didn't want to invest all the time to make the salsa this was something I wanted to be quick. Let me tell you my test taster(husband) was not at all upset about this idea. So we were shopping at Wal-Mart and my husband seen a new brand of salsa Verde from non other then Wal-Mart. He wanted us to try this so we bought a jar and tested it out on just a chip to see is this it.. YES IT WAS! I couldn't believe that a jar of salsa costing $1.98 would win over some that cost up to over $5 bucks. So I was ready to test it out and the end result was Perfect. I was so happy with the flavor of this salsa that we bought 6 jars to keep on hand(my husband eats this like candy!) I have tried this salsa in a few recipes now and I have to say it's yet to disappoint. So for all you Salsa Verde fans give this one a try and let me know what you think.

 This is what the Roasted Salsa Verde Jar looks like. Get this if not your missing out!
 Just add half the jar and 2 pounds of chicken tenders to crock pot.
Cook on high for 2 hours, remove and shred or dice then to a favorite recipe.  
This is the chicken Enchilada I made with the salsa. They were so darn good!

 
Roasted Salsa Verde Chicken
 
What Ya'll Need:
2 lbs. of chicken tenders
1/2 Jar of Roasted Salsa Verde
 
What to Do:
Place chicken and salsa to crock pot. Cook on high for 2 hours. Remove dice or shred and add to recipe.
 
Chicken Enchiladas: Use any tortilla of choice add chicken and cheese. Place in 13x9 dish. Mix the rest of salsa Verde with 12 oz. sour cream and topped the enchiladas with mixture add cheese on top and cook in oven for 20-25mins on 350.
 
*Cooking Note: I always check the chicken in crock pot around 1 1/2 hours just to make sure they don't over cook in crock pot. Also you can add more salsa if you want but the first time I cooked this it was more then needed and I didn't want to waste any salsa.


September 19, 2013

Mesquite Shrimp

I have been trying out different recipe's using marinades that are homemade and ones that come already made in bottles from the store. The brand I started with first was Lawry's. This time I tried the Mesquite flavored marinade for a recipe. I made shrimp tacos and this shrimp was very good. It didn't take long at all to cook. So over all I thought this was another successful recipe. I did decided that to finish the bottle I think I'm going to try it on chicken and grill them. I can't wait to see how that will taste.
 
 This is the second flavor of Lawry's Marinade that I have tried still impressed.
 Here's the shrimp Taco's I made had great flavor the shrimp was very good.
 
 
Mesquite Shrimp
 
What Ya'll Need:
1/2 bag of salad shrimp(no-tale)
I/4 cup of the seasoning

What to Do:
Thaw the shrimp out and place it in a container that has a lid. Add the seasoning to your liking I used 1/4 cup for 1/2 bag of salad shrimp and it was plenty. Let sit in fridge for 20-30. Cook shrimp on a sauce pan for 5-8 minutes.

*Cooking Note: If you cook more shrimp just read how long to cook them for on the bag of shrimp you use but best guess is once its white it's done.

September 12, 2013

Hard Boiled Eggs {Cooking & Peeling}


It's getting to be the season where you will be spending time with your family & friends. This means there will be food. Now with my family the one item you can bet there will be a ton of is Deviled Eggs. We love them!! I made 4 dozen deviled eggs at Thanksgiving dinner when I hosted it at my house. Every last one of the eggs was gone quick. I have boiled eggs more than one way and thought the way I was doing it had to be the easiest. I had seen a show on a cooking channel that showed an even better way then what I had been doing. So I wanted to share with you my new tricks to boiling eggs. I also will tell you a trick for peeling the eggs that is a game changer. Now some people already know these tricks and tips but for those new to cooking I wanted to share.

Here is a shot of them, I might have ate one before taking pictures, I love eggs!
Here's what Ya'll Do:
1. Choosing the Right Eggs
For perfect cooking, start with eggs that don't have any visible cracks. You don't want cracks in the shell because the minute the water starts to boil they split open and the pan fills with egg yolks. A tip for eggs also is if you have time let the eggs sit at room temperature for at least 5-10 minutes.

2. Boiling & Cooking
Depending on how many eggs you are cooking depends on the pan size. Just make sure you can place the eggs in a single layer, this helps the eggs from cracking.  Fill the pan with enough water that it will cover the eggs. *Add 1/2 tsp. of baking soda to the water. Then bring the water to a rapid boil. Let boil for about 1-2 minutes then cover and remove from the heat.

3. Timing is Everything
Leave the lid on the pan DO NOT REMOVE you will need to let the eggs sit for 13 minutes. The steam from the water continues to cook the eggs even though they aren't boiling any longer.

4. Stop the Cooking Process

Once the eggs are done cooking remove them immediately. Place the eggs in a "Ice Bath." Fill a bowl or the sink with cold water and add ice. Let the eggs sit in the cold water for about at least 10 minutes. You want to do this because some cooking will continue, particularly the yolk of the egg. An overcooked egg causes a green layer to form around the yolk. This is due to residual heat called “carry over cooking.” While they're in the cold water, it stops the eggs from cooking and a layer of steam develops between the shell and the egg white. The steam helps make peeling an egg much easier.


5. Peel and Enjoy
After the eggs have cooled peel and Enjoy. I tap the tip on counter and then roll and the shell slides right off.

 If you would like a good recipe for Deviled Eggs visit this Website: http://www.deviledegg.org/ or try mine  Classic Southern Deviled Eggs!

 Sometimes they are good with salt, pepper and paprika only!

***Cooking Tip: Use a Kitchen Timer, this helps keep track of the 13 minutes. You don't want to under do it or over do it. Keep track of time. Now the baking soda I said to add is to help peel the egg easier. Trust me my grandmother has been cooking her eggs the same way for as long as I have been alive. When I told her about this she changed her ways. So Give it a try it really works.  

*Just a Bit of fun for You Here is a Link to a YouTube Video of a guy who's got a different way to peel and egg. Give it a Look!  http://www.youtube.com/watch?v=PN2gYHJNT3Y

September 11, 2013

Baja Chipotle Chicken

Here is a recipe that I cooked in the Crockpot. I have been using different flavors with chicken and testing them in different recipes here is one that I like a lot. I used Lawry's Baja Chipotle Marinade. It was so good I will be making this one over and over. I made enough chicken to last me for three dinners. I will be trying more of the marinades soon. Hope you try this one and enjoy.
 This is the marinade I used. I also used this on pork chops they were yummy.
 Just add chicken tenders to crockpot and cover with just enough marinade. 
 Shred and enjoy this chicken in taco's, enchiladas or by it's self 

Baja Chipotle Chicken 
  
What Ya'll Need:
2 lbs. Chicken tenders boneless skinless
3/4-1 cup Lawry's Baja chipotle Marinade

What to do:
Place chicken in crockpot top with Marinade. Stir till all the chicken is coated the top and cook on high for 2 hours. Remove and shred with two forks and Serve.

*Cooking Note: This recipe is really that easy. Also the chicken stays moist and you can't ask for anything better.


Black Beans & Salsa

This is a simple and very easy recipe for black beans. I have been eating a lot of them in the past few weeks. I'm on a diet! I wanted to share the way that I like to cook. They can be added to a meal or eaten as a side dish. They taste so good. I hope y'all enjoy.

 Place the rinsed beans in a saucepan and add the salsa cook 15mins and done!
 
Black Beans & Salsa
 
 
What Ya'll Need:
1/2 cup Salsa(I used Pace its what I love)
1 can Black beans(I used HEB brand)
 
 
What to Do:
Rinse the Beans and add to a small saucepan. Add the salsa and stir. Cooked Covered for 15-20mins and Eat!


September 6, 2013

Special-K Cookies

 I'm so thankful for my Grandmother Norma! She is one of the most caring, wonderful person  I know. I can't express in words the love I have for my grandmother. We are so much alike and have a lot of the same interest. Spending time with her is like being with your best friend. She has and always will hold this very special place in my heart. I love that my daughter gets to spend time with her also. I was recently visiting with her and she shared a cookie recipe with me that I had never heard of called Special K Cookies. This recipe is for a cookie that is "No-Bake" with peanut butter and special k cereal. It could have been called No-Bake Peanut Butter Heaven; however that would be confusing for people I'm sure. It's a great dessert to have for people who like peanut butter. It's light crispy and peanut buttery goodness! I hope that y'all try this one and let me know that you think. Go ahead and give it a try.

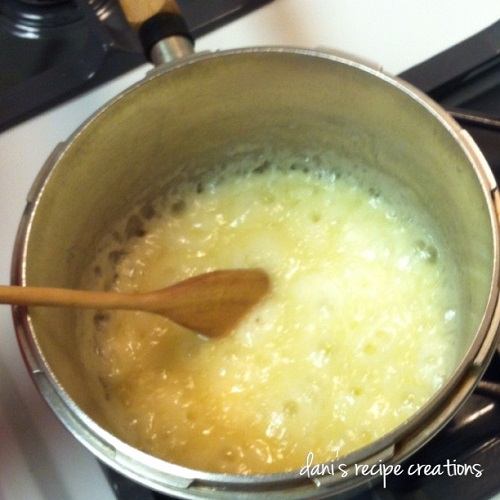
 Add Karo, Sugar and butter to a medium sauce pan
 Bring to a rolling boil for 2 minutes, don't over cook cause you can burn the mixture.
 Remove from heat add the peanut butter and stir till mixed then add the Special K
 It should look something like this!
 Drop any size spoonful's on wax paper quick it will set quickly. We made them big! 
 My grandmother said, "I make them big cause when I want a cookie, I want a cookie!" 

Special-K Cookies

What Ya'll Need:
3/4 cup White Karo
3/4 cup Sugar
1 Stick Butter
3/4 cup Crunchy Peanut Butter(could use smooth)
4 cups Special K Original Cereal

What you Do:
Bring to a rolling boil karo, sugar and butter. Boil 2 minutes, remove from heat add crunchy peanut butter stir till mixed then add Special K. Spoon on to wax paper, and enjoy.

Cooking Note: As the cookies cool they form and mold together. But, eating them warm is OH SO GOOD!

Thanks Grandma for Sharing this cookie recipe! I Love you

Veggie Bacon Avocado Sandwich

I had to share this recipe from Special-K. It's simple and easy. I would make this again. This was a light and yet very filling sandwich. This fit right in with my plans to eat healthier. Visit their site for other great recipes.

 
Veggie Bacon Avocado Sandwich
 
What Ya'll Need:
3 strips veggie bacon
1/2 avocado, seeded, peeled and mashed 
1 teaspoon lemon juice
1/8 teaspoon salt
1/8 teaspoon tabasco sauce
2 lettuce leaves
3 slices tomato
2 slices whole grain bread

What to do:
. Prepare vegetarian bacon strips as instructed on the package.  Meanwhile, in small bowl stir together avocado, lemon juice, salt and pepper sauce. Spread on one side of each toast slice. Place lettuce leaf, tomato slices and bacon strips on top of one slice. Top with remaining toast slice, avocado mixture side down. Cut in half.  Serve immediately.

RECIPE WEBSITE: Special K®